How to link WebsiteTravel and Rezdy
First step is to contact WebsiteTravel Support team on support@aagtech.io to get access to the 'Configure API Connections' button in WebsiteTravel. Please make sure you include the email address you are using so that the Support Team can assign the button to the correct user.
You can find the button in "My Details" under E-bookings Setup.

Below is a step by step help guide written by Rezdy on how to link and map products using Rezdy.
Initial Setup: What you need to get started to connect to WebsiteTravel
- You must create and register an account with WebsiteTravel.
- You must create and publish products within your WebsiteTravel account.
- You must create products within your Rezdy account.
Share a Negotiated Rate
- Click here to load Website Travel's Marketplace profile.
- Click the Add Agent button
- Read our T&C in regards to OTA connections and click Send Your Rates if you agree to proceed.
- Scroll to Rate,Select the Negotiated Rate for this agent. Click here to learn how to create a negotiated rate.
- Scroll to the bottom, click Add agent
Complete the Rezdy/WebsiteTravel product mapping
Important: You must have created and published products within your WebsiteTravel operator account to complete the product mapping.
Below Agent Information, there will be a message with a click here link. This will open the WebsiteTravel eBooking system setup page.
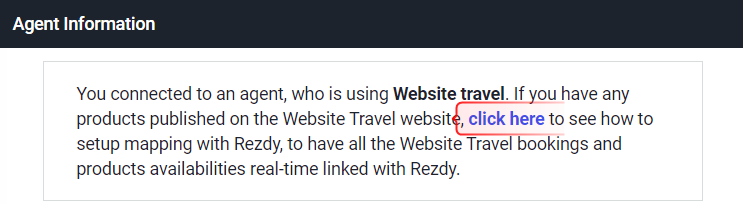
This page will contain all the information required to complete the mapping, which is divided into 2 sections; Connection level data & Product level data.


Note: The data and mapping codes are case sensitive, we strongly recommend copying & pasting this information into WebsiteTravel. Connection and product level configurations are found in separate areas within WebsiteTravel, if you need further assistance with the mapping; please reach out to your WebsiteTravel support team.
Future changes to product price structure
WebsiteTravel map to your Rezdy product price labels i.e. Adult and Child etc. If you change or add any price labels, you will need to complete step 2 once again.
If you are already connected to us, but haven't shared a certain product, please follow the below steps:
Go into Agents>My Negotiated Rates and look for the list with which you're sharing rates to an agent. Once you find that list, click on it to open up the view of all the products you have shared and not shared (this list will have many and sometimes all products checked off and some not checked off). Here, just select any product that isn't shared or connected but you want it connected and check the checkbox off like the others and save the changes. Once this saves, typically after a refresh on the agent/OTA side they will see the product and be able to connect and sell it.
Map Fares in WebsiteTravel CMS
1.1 Go to ‘My Products’ > ‘View Products’ and click ‘View’ on the product

1.2. Go to ‘Step 5: Fare Prices"

1.3. Click on ‘No Map’

1.4. Click green GENERIC button and choose the product and fare you wish to connect to this WebsiteTravel fare.

1.5. Enter your product identifier.

Please note Rezdy mapping (Product ID ) usually looks something like this PFZD1W-#PAdult where the first part is your product id and the second part signifies the type. So for example a child mapping would be PFZD1W-#PChild
1.6 Click "Continue" and the mapping for the fare is saved.
1.7 If you have more fares, please repeat each step above for each fare.
CREDIT and References:
https://support.rezdy.com/hc/en-us/articles/360038630554-How-To-Connect-to-WebsiteTravel
https://support.rezdy.com/hc/en-us/articles/203836384--How-to-connect-or-add-agents